Step by Step Guidance:
Step 1: Getting Started
Ensure that you have the Microsoft Lens app installed on your phone – head to http://go.qub.ac.uk/LensAndroid if you’re an Android user, or http://go.qub.ac.uk/LensiOS if you’re an iPhone/iPad user, and download the app to your device!
Step 2: Signing in with your QUB Credentials
Next up, make sure you sign into the app with your Queen’s login details (your student email address, student number and password) – follow the actions below to do this:
- tap the menu button when you open the app, and enter the settings menu,
- tap the Accounts and Privacy/sign in button,
- then tap add account,
- and follow the rest of the instructions, ensuring you sign in with your QUB login details!

Step 3: Scanning your Work
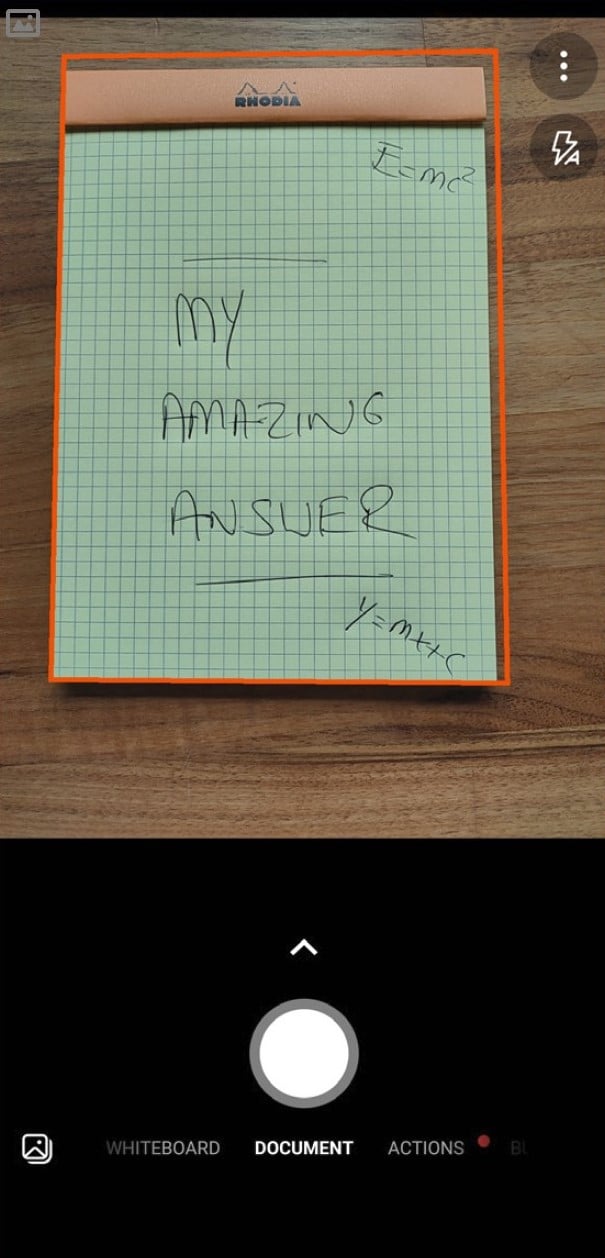
When you’re signed in and ready to scan your work, use the app in the same way as your phone’s camera app – Lens will place an orange border around your document, showing you the image that will be captured, so make sure all of your work is within this box!
When you’re ready to scan the page, press the button at the bottom of the screen to scan the page!
Step 4. Optimising your Scan
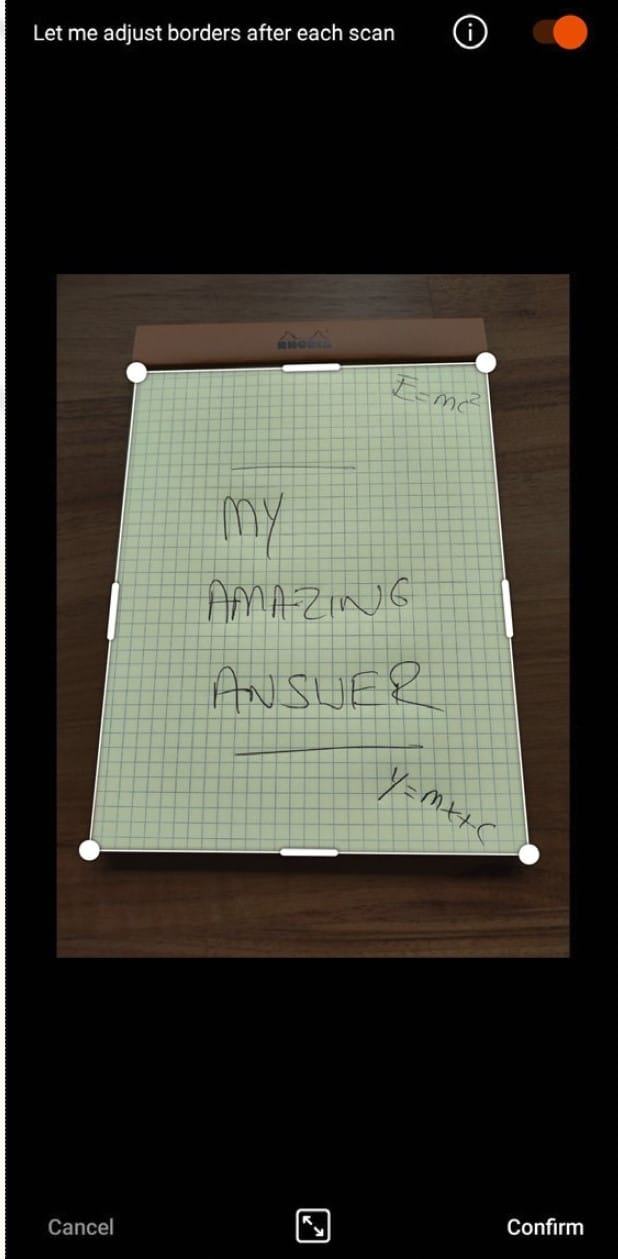
After you scan your work, the app might not have selected the edges of your work perfectly – this can happen if your device isn’t perpendicular to the page when you scan the document!
If you need to, you’ll be able to more accurately select the edges of your work by tapping and dragging the handles at the corners and sides of the image so that they match the edges of the page you’ve scanned – once you’re happy, you can tap the confirm button to move on to the next step, and finalise your scan!
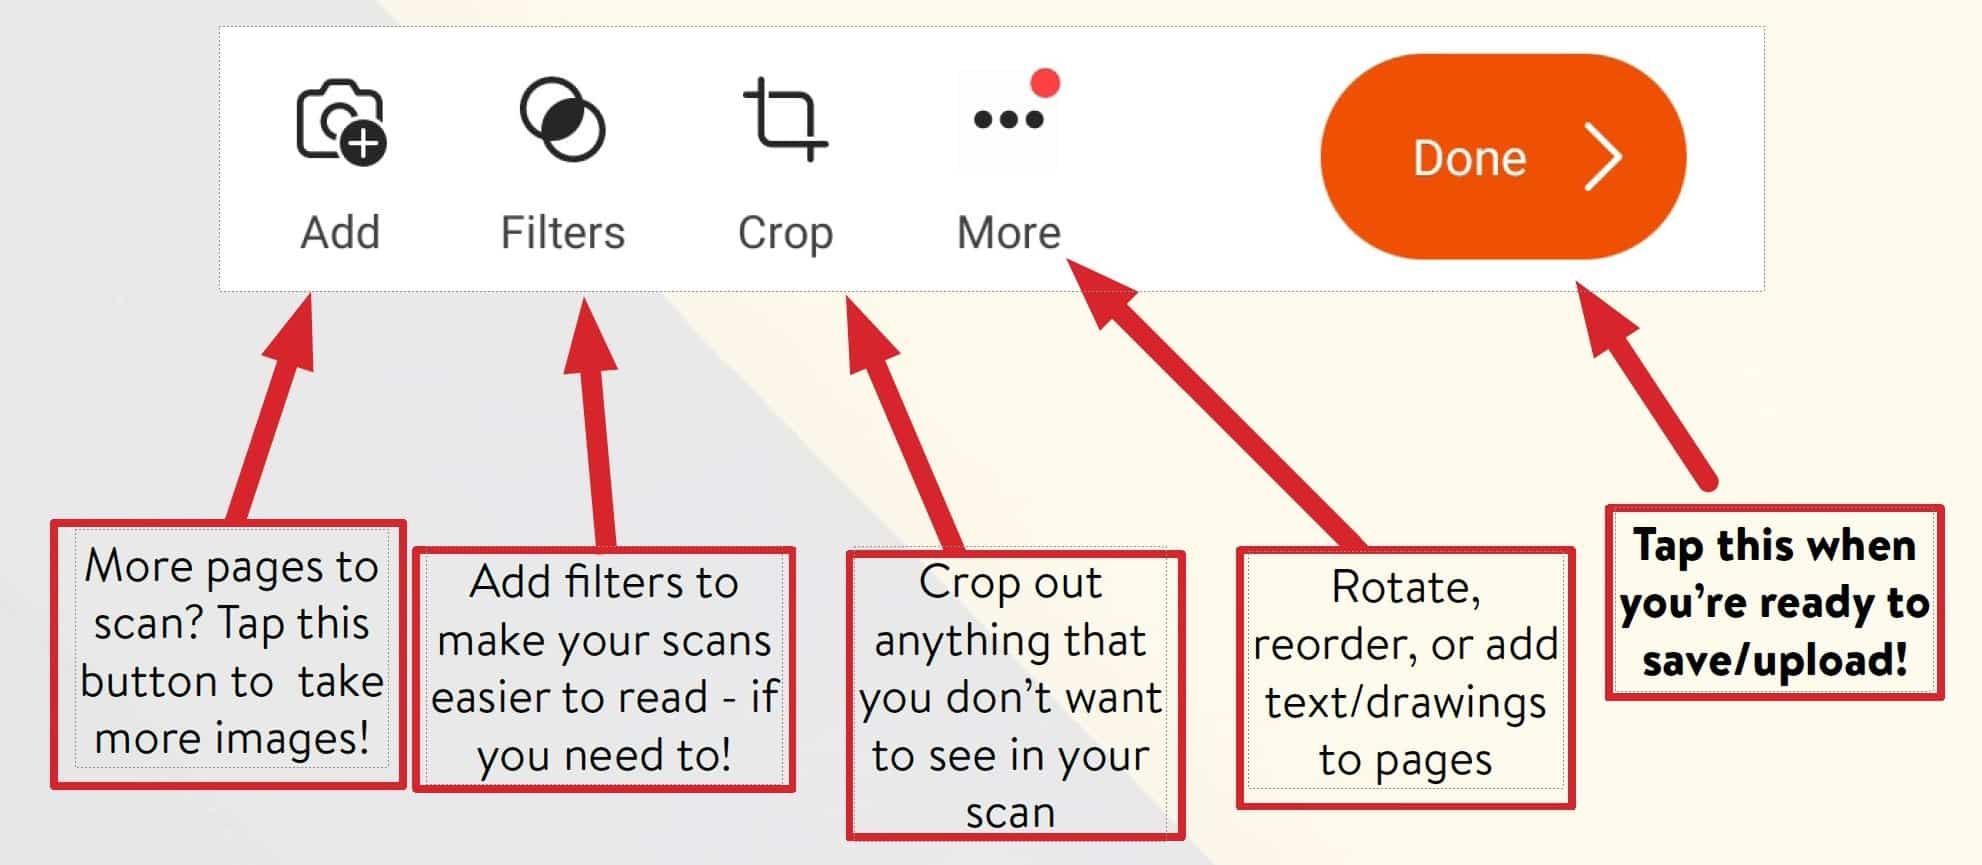
On the next screen you’ll be able to make use of the various buttons to enhance your scanned image…
Step 5. Saving your Work to your Device/Uploading to OneDrive
Once you’ve scanned all of your work and made the changes you want, it’s time to save your work to your device, or upload it to OneDrive – using OneDrive will allow you to easily pick your work up on your computer so you can share or upload it from there!
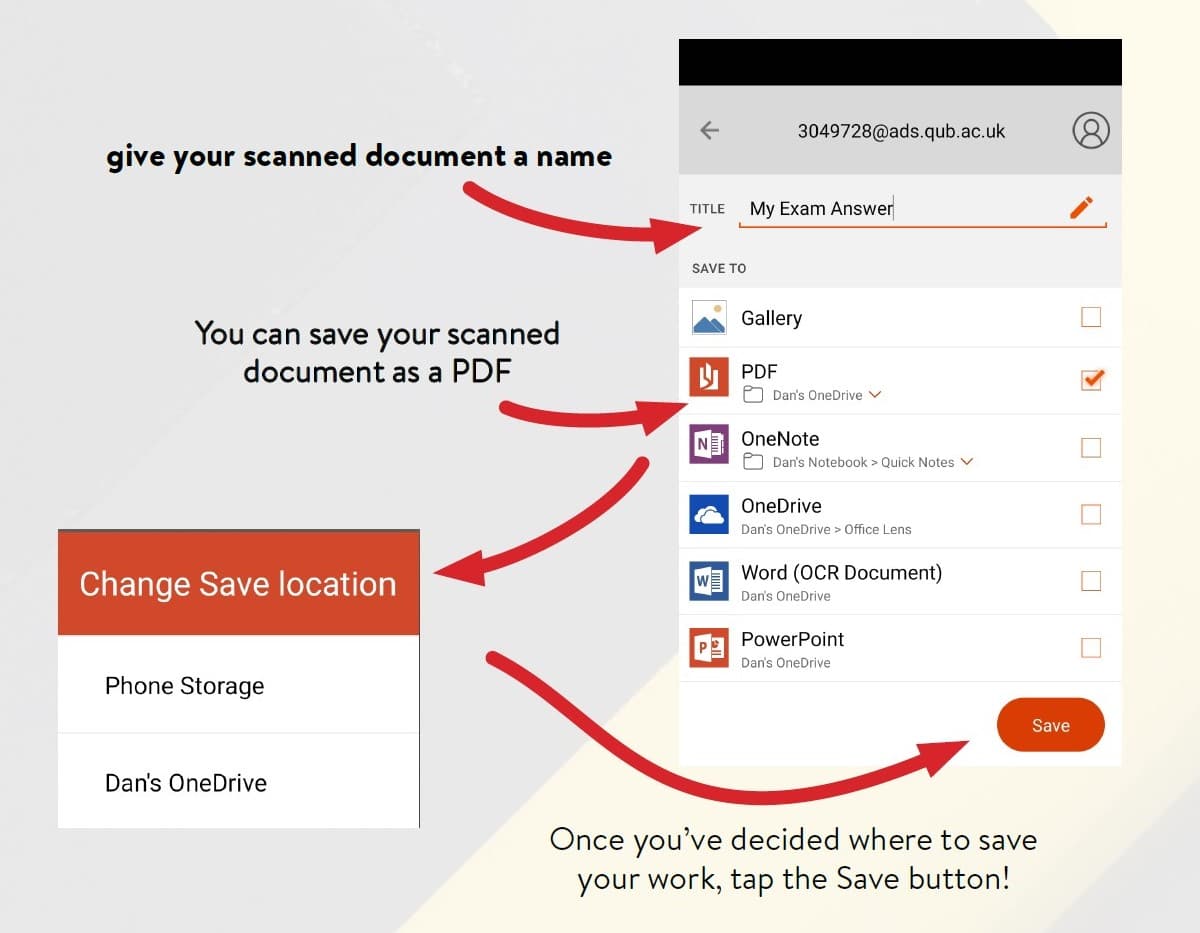
- Make sure to give your scanned document a name that you’ll remember and that makes sense!
- You can save your scanned document as a PDF directly to your device or to your OneDrive – tap on the folder icon to make this change
- Once you’ve decided where to save your work, tap the Save button!
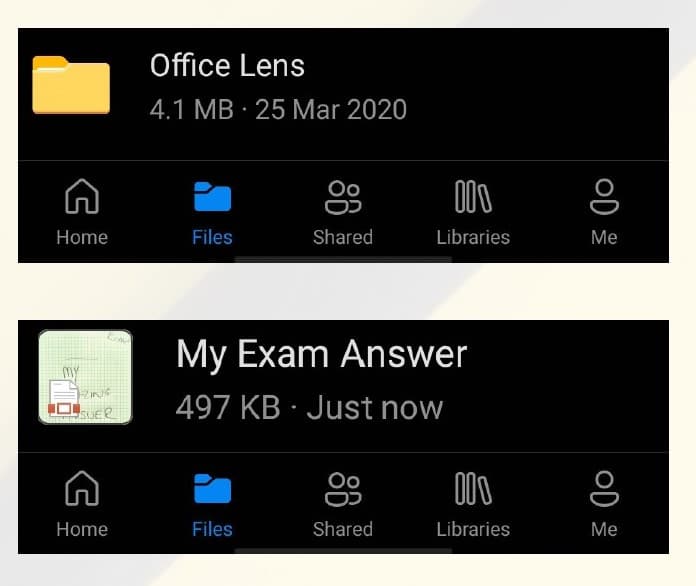
If you opt to save your work to OneDrive, you’ll be able to see your work in a folder called “Office Lens” – from there you can share, submit, or download your work to your computer! You’ll of course be able to see this on the OneDrive app on your mobile device too!